My 10th day of Christmas is finally finished! This project took crazy long as well. As, I suppose, should be expected when one commits to handmaking 50 Christmas cards.
These cards were specifically designed for my clients. I am sending them to my 2012 clients and any client that has already signed a 2013 contract with me.
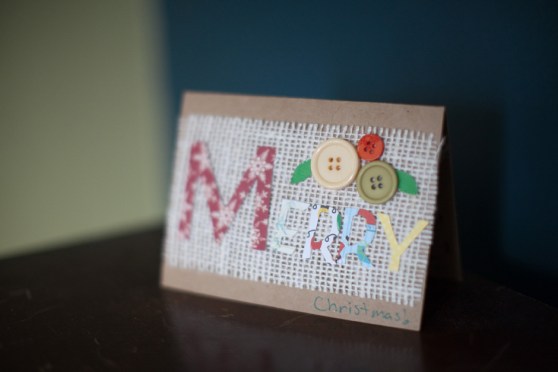
The idea started on Pinterest and I let my creative juices flow from there. I was actually looking for Christmas wreath ideas when I saw this card and it occured to me that if I were to get a Christmas card from my photographer I would LOVE it 🙂 And so the project began.
What I liked about this project was the evolution of the ideas and design. I dove in head first and tweaked the design as I went to spice up the routine a little bit. As a result I came up for several variations of a similar card as you see below. It was also super fun playing with a Cricut and I liked the potential that it might spur on some sessions from present clients because I simply LOVE working with them 🙂


Supplies needed:
- cards (color of your choice, I got mine at Hobby Lobby for 50% off and they had lots of plain cardstock options)
- scrapbook paper (Hobby Lobby individual scrapbook paper selections, $.59/ea I think, and if I were to do it again I would choose simpler, more solid color patterns)
- burlap ribbon (Amazon)
- buttons (Hobby Lobby for a couple bucks)
- stamps if you choose to incorporate those
- sharpie markers
- printer paper (if you are printing your message)
Your steps:
Tip: I did everything in masses so the workflow was quickest so do each step to every card first then move to the next step. The exception to the rule is for steps 8 and 9, I focused on one card until it was finished.
- Apply any stamps
- Cut your ribbon segments
- Apply hot glue to the four corners of your ribbon and paste on your card
- Cut all your letters (I borrowed a Cricut from a friend for speedy working)
- Hot glue all the letters in place
- Hot glue your message into the card OR write your message
- Cut your paper leaves and snowflakes
- Hot glue paper leaves and snowflakes
- Hot glue buttons
- Stamp envelopes
- Address and apply postage stamps to envelopes
- Stuff cards into envelopes
- Seal envelopes

Pingback: Client Christmas Cards » a Sunshine Moment
Pingback: 12 Days of Handmade and Homemade Christmas: a Summary | Musings of a Musician's Wife