12 Days of Handmade and Homemade Christmas: Day 7 – 9

I am almost there!  This next set of projects took a lot less time, say 2 to 3 hours instead of 8 to 10 😉

Day 7:  Sharpie mugs

Josh and I have the privilege of meeting with two small groups.  What’s particularly great about these groups is neither was started as a couples small group.

I have been meeting with the same group of girls for 3 1/2 years.  A year ago one got married, four months ago another got married, and three and a half months ago the third left to study in New York for a semester.  So, with just three of us we decided to double our numbers by adding the guys while Mary was gone.  I originally made these mugs for the gift exchange we were to do last Thursday but, because of a flu bug, our Christmas party was postponed and now I only need one gift to exchange since Josh is gone this week.

The other group we fondly call “couples and pizza” even though we have been meeting as a small group for a few months and haven’t been back for pizza in a while.  Again, a few years ago, not too long after Josh and I got married we started going out for pizza at this great local place called The Squire with our friends Kyle and Amelia.  After a few months of just us we invited another wife that shared a class, Screenwriting, with Ami and I and before long we grew into a 10 “member” group.  Amelia and Kyle moved away for a year but came back just in time as we transitioned into doing a Wiser Together small group study put together by Willow Creek Community Church.  I’ve loved where the study has taken us as a group and really brought us together as a community doing life together and spiritually shepherding one another.  Even though I miss looking forward to pizza I really love how studying every week together has made us a family.

Side note:  for those of you not in a small group… I SERIOUSLY recommend it!  It is good for the growth of the heart, soul, and mind in so many ways.  AND, if you are thinking of starting a small group or joining a small group I wholeheartedly recommend Wiser Together as a great launching point for a group.  Really builds a strong foundation for the group by getting to the nitty-gritty and establishing trust.

Anyway, it is for this second group that I am now contributing the Christmas mugs for our gift exchange tomorrow.  So, group, spoiler alert!  If any of you are reading you know what one of the gifts is.  BUT you don’t know how I’m wrapping it 😉

I can say I came up with this idea on my own.  At least the colorful Sharpie and mugs bit of it.  My friend Megan a couple of weeks previous had told me how she was making creative plates by simply writing in black Sharpie on them.  So when I was pondering what $10 gift I could give that was a little more fun the mug idea came to me.  So I went to IKEA and picked up a couple of their standard white mugs, IKEA 365+, for about $6 – don’t worry I have another little something with the gift to make is $10, I am no cheap skate 😉  At home I have a plethora of colored Sharpie markers so I selected the appropriate color for each of the words I had selected to write and silver for some snowflakes I wanted to draw on the mugs as well.  My word choices coincided with the words I’ve been holding at the front of my brain this December as I’m working through my projects and really working to keep my focus on Christ and the main things He stands for:  peace, hope, love, and joy.  Megan was over working on some cards so together we decided that deep blue was for peace (like the calming ocean waves), green was for hope (like the hope of growth in spring), red for love (of course), and light blue was for joy (red, orange, yellow, and pink would have been fitting too but red was already taken, orange isn’t really Christmas-like, the yellow wouldn’t show and I don’t particularly like pink).

What I loved about this project was how nice and easy it was, that I was able to spruce up my gift giving on a budget and in a personal way, and that I could also give the gift of the reminders of those four important words.

mugs

Supplies needed:

  • at least one mug (IKEA 365+ for $3/ea)
  • Sharpie/s – colors of your choice
  • oven

Your steps:

  1. preheat the oven to 350 degrees
  2. draw on your mug (if you make mistakes you can rub it off with a little, good ‘ol fashioned, spit)
  3. put in oven for 30 minutes
  4. the end

Day 8:  Calhoun Christmas Card 2012

Every year, except for our first married Christmas, Josh and I have sent out Christmas cards.  After the first year of receiving a little pile of Christmas cards for our fridge I swore I would contribute to our friends fridges in the years to come.  Just one of those things I didn’t think about as a brand new homemaker 😉  I LOVE Christmas cards.  I love making them.  I love getting them.  What’s not to like really, you get the most adorable picture of the ones you love to keep in your house until the next year when you get to put up a new one.  I’m thinking that I will start saving them in this easy, make-shift binder idea I have for when my fridge fills up too much.

The first couple years I used VistaPrint for our Christmas cards.  What’s nice about them is they are SUPER cheap and there are designs for you to choose from right there.  But this year I started designing cards myself for my photography clients so I decided I should do the same for Josh and I.  Ironically, for ours, I actually purchased a design template from Etsy and customized it to fit us and my printing needs then I got it printed through my lab.

What I liked about this project was choosing a fun design and the intent of a simple gift to everyone Josh and I hold dear.  I personally value the Christmas cards that share the year’s story so I can get properly up to speed with friends, even if I gave talked to them.  I love getting to hear highlights and lowlights of the past year in this simple, straight-forward way so I always make a point to do so on our cards.  Kudos to Grandma Joyce because it was the Christmas card I received from her and Grandpa that prompted the personal message idea.

For this year’s message I also wrote a poem, but here’s all of what we are sharing on our cards that I’m popping in the mail today:

Christmas card back design

Christmas card back design – for better viewing of the text 😉

Christmas card front

Christmas card front

Christmas Card Back - to Grandma Lu ;)

Christmas Card Back – to Grandma Lu 😉

Supplies needed:

  • a professional photo lab or a professional photographer to go through or maybe you can come up with another brilliant idea/solution
  • Adobe Photoshop
  • a postcard design template (I got mine from Etsy from the frankandfrida shop, Prescott Blue- 5×7 Holiday Card)

Your steps:

  1. purchase your design
  2. customize
  3. write your holiday message – please 😉
  4. send to the printer
  5. they arrive at your doorstep
  6. address and send!

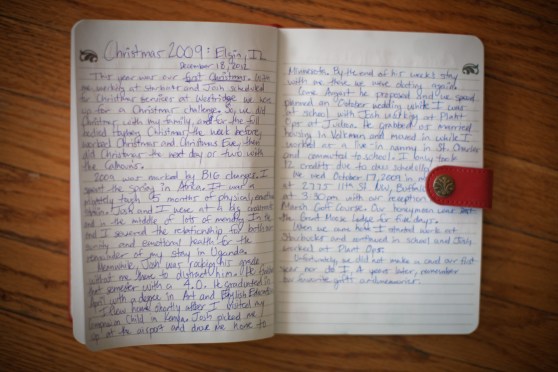
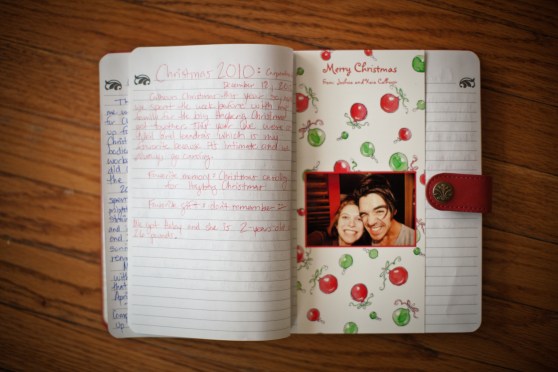
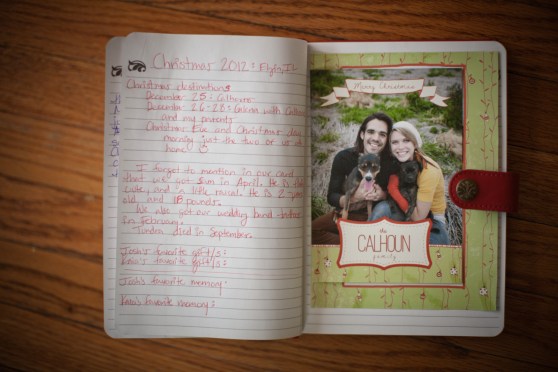
Day 9:  Christmas book

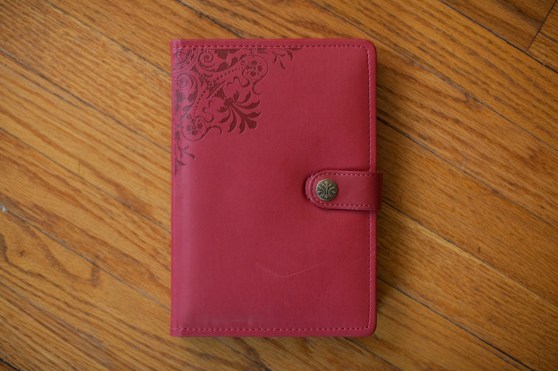
So I have been in need of a final project since the conception of the idea to do this whole 12 Days of Handmade and Homemade Christmas thing.  All along I’ve had 10 solid ideas with 11 and 12 fluctuating in and out.  I had a circulation of three handmade gifts that I was flirting with posting but, in the end, only chose to include the mugs (Day 7, above).  So that still left me with one day that I was unsure what to do with.  I thought I might make a yarn wreath, split my snowflake making into a couple of days, or make some more ornaments (sparkles or stars) but I didn’t particularly love those ideas because I already had a wreath and didn’t have a place for another one, splitting snowflake making is lame, and after my crayon ornaments, pine cone ornaments (Day 2), and origami star tree garland (Day 1) I had a full tree.  Then, a couple of days ago, I was doing some blog research when I came upon a “Christmas book” idea.  Since I am starting this on mine and Josh’s fourth Christmas I filled in the first few years from memory and got us caught up to this year.  All I have left for this year is to list our 2012 favorite 2012 Christmas memories and favorite 2012 Christmas gifts.

What I liked about this project was having a place to keep track of our yearly Christmas card, I could make use of a cool and Christmas-like journal my mom gave us a year or so ago, and I could keep a log of major year happenings mixed in with Christmas anecdotes like favorite gifts and Christmas events (Christmas with who and what we did).  Then, I can pack it up with our Christmas stuff at the end of the season so it can come out naturally for another round next year 🙂

IMG_9424

IMG_9426

IMG_9427

IMG_9428

IMG_9429

IMG_9430

I think after this Christmas I am going to have Josh write in it because his handwriting is much prettier.  This is what I get for not thinking to utilize his penmanship when he’s in town! 😉

Supplies needed:

  • a journal or unlined book of sorts
  • a pen or pencil
  • a personal Christmas card

Your steps:

  1. purchase a journal (there are nice leather books like mine sold at Target I know)
  2. paste in your Christmas card
  3. get to writing (I recommend Christmas destinations, favorite Christmas memory, and favorite Christmas gift/s)
  4. at the end of the season pack it up with your Christmas decorations

This week’s posts to come…

Wednesday, December 19…  Wednesday Words: an inside look at recording Citizen Way

Thursday, December 20…  12 Days of Handmade and Homemade Christmas: Day 10 – 12

Friday, December 21… 12 Days of Handmade and Homemade Christmas:  a summary

Off for the holidays… THEN, to bring in the new year, a photo a day (covering the last two weeks of December with all the Christmas happenings).

12 Days of Handmade and Homemade Christmas: Days 4 – 6

Day 4:  PEACE Letters

Again, I stumbled on this idea through Pinterest.  The project looked simple and it would be free for me since I already had all of the supplies.  I wasn’t sold on the idea though until the message at church inspired my word choice.  Bill Hybels spoke of how the Christmas season is the most joyous and sacred season of the year, yet the majority of the time it becomes the most stressful and busy because of all the demands.  So, he inspired me to not only make a conscious effort to intentionally carve out extra peace in my life to really soak in the gift of Christmas but to assert the commitment to do so with a visual reminder.  What I loved about this project was the tediousness of it.  It took me a solid 6 – 8 hours to complete but it didn’t involve a lot of brain power so I got to sit and create in the quiet, with Christmas music, or with a movie.

PEACE letters

Supplies needed:

  • yarn of your choice
  • scissors
  • tape
  • cardboard

Your steps:

  1. cut out your cardboard letters
  2. cut out cardboard segments to line straight sides and small segments to support curves (this is how you get the block letter effect)
  3. tape the block letters together
  4. tape the beginning of your yarn to the very end of one of your letters
  5. start wrapping – I found I was most successful when I wrapped fairly tight, but not so tight that the cardboard started giving way to the pressure
  6. you will run into hurdles with each letter and really the only way to work it out is personal trial and error because it’s different for every letter (curves and corners are difficult)
  7. at the end of your wrapping simply tuck the end of your strand into an appropriate place and admire your work 😉
  8. repeat steps 5 – 7 for each block letter you created

DAY 5:  Christmas Wreath

The wreath is how this whole 12 Days of Handmade and Homemade Christmas idea came about.  Josh and I have never had a wreath so I decided I wanted to find one I liked.  In the end I resolved to make one because I’m so picky 😉  Since I had been contemplating doing something with a 12 Days of Christmas theme the handmade wreath idea gave me the idea to add Christmas spirit to our home and lives with 12 unique projects.  I must say, of the projects so far this is one is at the top of my list.  My wreath consists of a great variety of ornaments.  My original idea was to create it solely out of my crayons ornaments but six ornaments in and a couple hours later I realized it would take me 10 times longer if I didn’t reevaluate.  I managed to create a dozen crayons ornaments for the wreath and then I hit Hobby Lobby for a plethora of medium and small sized ornaments of various colors and sheens.  What I love about this creation are the “bubble” ornaments, the “snowball” ornaments, my crayon creations, the party of colors, and the fact that since I didn’t stick to just red and green I can leave it up all winter!

Ornament Wreath

Supplies needed:

  • lots of ornaments – I recommend a variety of sheens and colors for a dynamic presentation but you definitely need about 100 or so, depending on the size of your wreath, and you will need 2 – 3 different sizes to fill it out properly (Hobby Lobby has 50% off all ornaments starting in December until they run out of them)
  • pipe insulation tubing – I used one 3′ tube and I wouldn’t go smaller but if you wanted bigger you could use two of them and cut it to size from there or you might be able to find one extra long one and trim that to size (Menards 4 pack of 3′ tubes for 1/2″ pipes from the plumbing section for $.97)
  • hot glue gun (Hobby Lobby for a couple bucks)
  • hot glue sticks – about one per box of ornaments, I probably used around 8 total (Hobby Lobby for a couple bucks)
  • masking or duct tape
  • ribbon of your choice (I got Jute Burlap Ribbon from Hobby Lobby)

Your steps:

  1. for my 3′ tube I simply plucked it out of the bag, looped it around, and taped the ends together with a few rounds of masking tape
  2. take out the ornament hanging pieces
  3. leave your wreath laying flat on your worktable in the same position for the duration of your creating
  4. start with your biggest bulbs and work your way to the smallest ones
  5. start with the inside and outside of the wreath and work your way in to the top/center
  6. apply glue to the surface of the circumference of the bulb opening and stick on your tubing
  7. for the smaller bulbs that act as fillers they won’t touch the tubing so the application of the hot glue will be at the points of contact with the other bulbs
  8. as soon as your surface is sufficiently covered string your ribbon through the maze or ornaments and hang in your desired location

NOTE:  I know it seems scary to be trusting hot glue to secure everything but it’s so strong that if you try to pull any off that aren’t just attached to the tubing you will shatter them at the pressure of your hand before the glue gives way – yes I did this once and only once 😉  So, knowing that, you should only remove bulbs that are attached to the tubing only, and even then do so sparingly because you will be taking chucks of tubing out every time – I also only did this once.

DAY 6:  Snowflakes that won’t melt!

Since I was a kid I have always been fascinated by the natural world around me so, naturally, snowflakes have always given me joy because of the never-ending flow of unique patterns that flit down the winter sky.  So, when I stumbled on these popsicle snowflakes on Pinterest I was immediately sold.  I did find that the example I was following turned out cluttered and less than satisfying so I got creative and attempted to create a few varieties and patterns of my own until I settled on this.

What I love about this project is, again, the tediousness of it.  I loved how it became pretty mindless after sorting out the first one so I could enjoy the quiet, some Christmas music, or a movie while I was working.  I also love that I can keep them up all winter since they are not Christmas specific 🙂

Snowflakes

Supplies needed:

  • 36 popsicle sticks/snowflake (again, Hobby Lobby for a pack of 100 for a couple bucks)
  • wooden buttons – the image I followed used circular wooden wafers but I love buttons (big and small wooden buttons from Hobby lobby)
  • hot glue gun
  • hot glue sticks
  • white matte spray paint (one big can sufficiently covered my 6 snowflakes but I went for a little more of a rustic look so if you want something more sleek I would go for a glossy white and get two cans to really douse them in white)

Your steps:

NOTE:  attach each popsicle stick with a dot of glue unless otherwise noted and use the biggest buttons for the middles of the snowflakes and the smallest for the outside

  1. start with the center and work your way out
  2. line up the center six sticks so they are evenly spaced – you can check the spacing with on of the popsicle sticks, its the perfect length
  3. swiftly add a dot of glue to the center point of each stick and place your button or wafer – if you’re too slow the hot glue will be too cool
  4. to attach the next length to the center piece you will use the interior star pattern to connect them – the less overlapping the better
  5. so, lay out six new popsicle sticks to double the length of the center piece
  6. spread glue across the very tip of a new popsicle stick and attach it to the two touching, extended popsicle sticks so that the hot glue is adhering to both of them
  7. repeat step 6 until all the lengths are attached
  8. go back around with new popsicle sticks to complete the zigzagging pattern – three layers total in this spot (base of two touching but not overlapping sticks, stick 1, stick 2)
  9. at the halfway point of the outermost popsicle stick place a new popsicle stick
  10. at the same point, on top of the previously adhered stick, place another facing the opposite way
  11. at the same point place the button – four layers total in this spot (base, stick 1, stick 2, button)
  12. repeat 9 – 11 until finished
  13. spray paint entire piece to taste

Because explaining the procedure of this particular project is so hard/confusing I took some picture of the assembly process for your viewing pleasure.

Steps 1 - 5

Steps 1 – 5

Steps 6 - 12

Steps 6 – 12

Coming up next…

December 18… 12 Days of Handmade and Homemade Christmas: Days 6 – 9

December 21… Days of Handmade and Homemade Christmas:  Days 9 – 12

December 28… 12 Days of Handmade and Homemade Christmas:  a summary
Why so late?  Why after Christmas?  Because a couple of the days are gifts and I can’t give away the SURPRISE! 😉

12 Days of Handmade and Homemade Christmas – Day 1 & 2

As you can tell by the title of this blog post I am already delayed in blogging about my 12 Days of Christmas creative experience.  My excuse:  internet failure.  From here on out it shall be daily until the deed is finished on December 12 🙂

Throughout November I pondered the thought of the 12 days of Christmas.  I knew I wanted to participate but I ran circles around the fact that giving Josh 12 days of presents would significantly  mark down the number of gifts he could receive on Christmas.  I also pondered candy and food gifts but I wasn’t stoked about that idea either.  Then, while searching for wreath ideas on Pinterest the idea came… here I present to you the 12 Days of Handmade and Homemade Christmas.

DAY 1:  Christmas tree garland.  The idea came because I wanted to spruce up our tree by means of personal touch.  My thought was to cut circles out of pretty paper and string them on yarn but I wasn’t in love with the idea so I pondered a little longer.  Then it came to me when I saw these super fun Origami stars.  Now I give you the first ever Origami adventure of the Origami star master 😉  Behold…

"love"

“love”

My personal favorite :)

My personal favorite 🙂

Your steps:

1.  Go get scrapbook paper (I got mine from Hobby Lobby in the a ‘la carte section scrapbook paper section)

2.  Watch a youtube video on how to do Origami Stars

3.  Cut strips of paper about 3/4″ thick.  I found between 1/2″ and 3/4″ made for the easiest Origami

4.  Origami a star but before you slip the tail into the mass slip your string into the crease.  Then seal.

5.  Repeat steps 4 and 5 until your garland is finished.

A string of three...

A string of three…

DAY 2:  Sparkling Pine Cones

Josh and I took the dogs for a walk and lo-and-behold I set eyes on five perfect pine cones.  They certainly looked like they belonged on our Christmas tree so we snatched them up and headed on our merry way.  When we got home I pulled out my handy dandy powdery glittery spray can and set to dress up my pine cones.  By the end of spraying, as my friend Jeremy’s said, it looked like I slapped a fairy…

Handmade fairly dust ;)

Handmade fairly dust 😉

…but TA DA!  Project Pine Cone = success.  Easiest Handmade and Homemade project for sure.

Your steps:

1.  Go find pine cones

2.  Spray with Glitter Blast Diamond Dust spray paint (Hobby Lobby)

3.  Let dry on some scrap paper

4.  String with dental floss by wiggling the thread at the base of each pine cone so its buried around the neck.

5.  Hang to taste 😉

Sparkling Pine Cone Ornament

Sparkling Pine Cone Ornament